|
|
|
|
|
|
|||
|
PlotCalc.com:
20.04.2024 PlotCalc 2024.04.20 - CorelDRAW 2024 support has been realized [more..] |
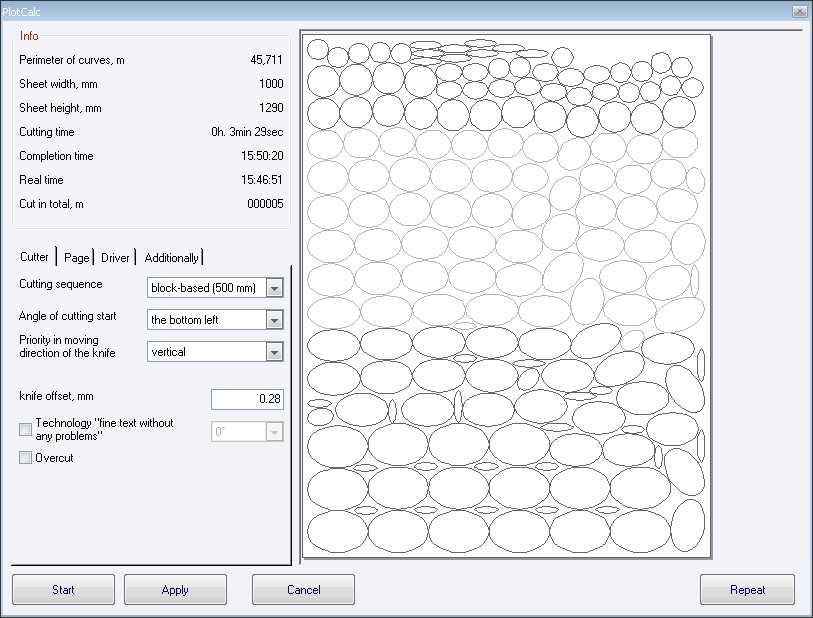
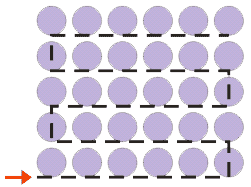
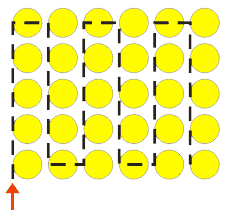
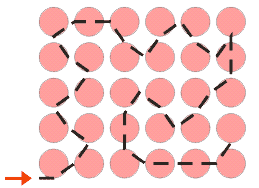
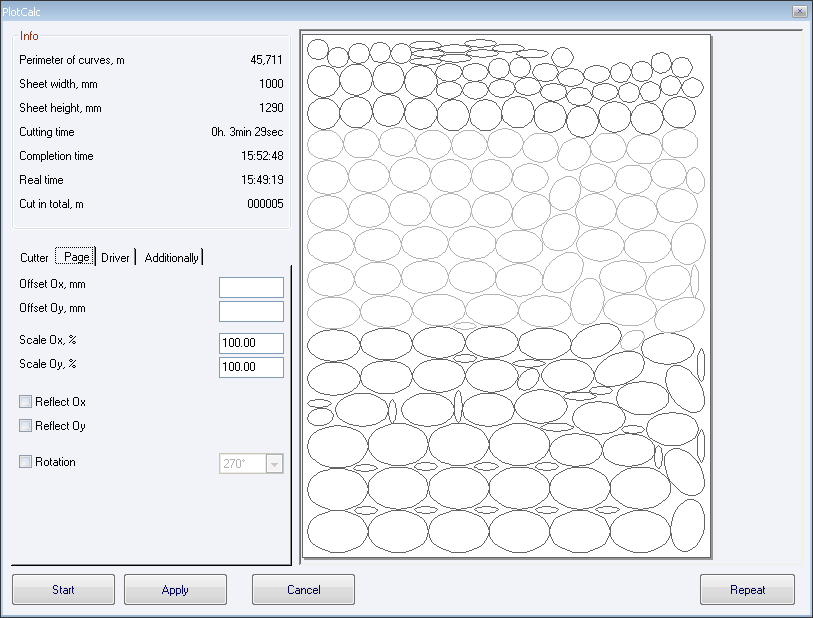
Output to the cutter and optimization of cutting sequence [backward] 1. In order to deliver to cutting, detach the figures and click the button “Cutting” on PlotCalc toolbar. 2. Enter cutting sequence: optimal or block-based, the optimal one sorts the figures so that the knife goes the shortest route on the whole sheet; the block-based one splits the sheet into blocks (200 or 500 mm vertically) and optimizes the route inside of each block. It is suggested to use the block-based option if the size material is too big and you have a lot of small figures. 3. Enter the angle of cutting start, usually it is the bottom left. 4. Enter priority in knife movement direction: horizontal and for some a vertical one, in order to make the knife to do more moves left-right and the plotter moves the tape back and forth less; or enter the same if it is not of an essence for your equipment.
5. Click the button “Apply”, it allows you to see cutting sequence of the figures, in order to view again, click “Repeat”. 6. Enter knife offset, usually 0.2-0.3 mm. 7. If you need to cut a fine text (3 mm, 10 mm, 30 mm), you may enable the option “a fine text without any problems”, the knife of the plotter starts cutting of each new letter at an angle of 0° or 90° that makes entry points to be invisible, releases from burrs and “dancing” letters, and it makes tape sampling very easy (provided that before delivery to cutting you used the function "accelerator of tape sampling"). Attention! For correct work of this function you need to determine accurate value of knife offset, otherwise the result will be poor.
8. If you use an old cutter or enable the option “Overcut”, if required, PlotCalc will prolong the start and end of a closed figure by the value entered into the knife offset field. 9. You may enter necessary features for offset, scale by axes, rotation and displaying of the figures in the “Page” Tab.
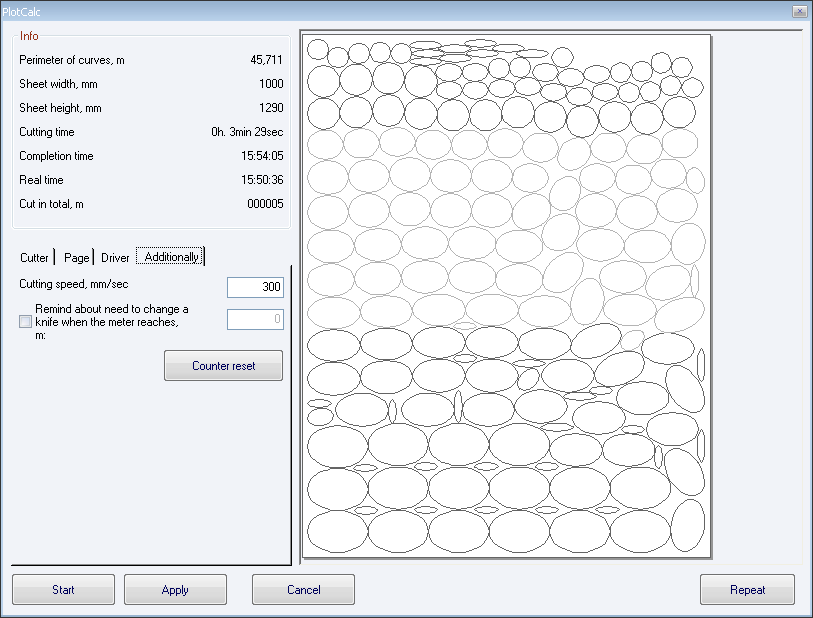
10. Select your cutter driver in the “Driver” Tab, provided that the cutter is installed as printer. If the cutter works via com-port, unfortunately, this option is not currently supported. 11. You may enter cutting speed in the “More” Tab in order PlotCalc might calculate cutting time.
12. Click “Start” to cut. |
||||||||||||||||||||||||||||||||||||||||||||||||
|
|||||||||||||||||||||||||||||||||||||||||||||||||